


Furniture stripping means removing old paint, varnish or finish from wooden furniture to give it new life. This is the first step in making the old parts fresh and clean again.
Why is furniture removal a good DIY project? Once the dresser is finished, I'd say it's the perfect weekend project.
You don't need special skills or expensive ideasforeurop tools to get started. The results are clearly visible and the pleasure of doing it yourself is worth every minute.
In this guide, I'll teach you everything I've learned: choosing the right tape products, the tools you need, safety precautions, and step-by-step instructions.
I've made a lot of mistakes along the way and I'm sharing them so you can avoid them.
By the end of this article, you'll have the information you need to confidently start your first comic book project.
Advantages of furniture removal
When I first laid eyes on my grandmother's old oak table in my basement, I wasn't sure whether to fix it or buy a new one.
After working for three weekends, I can tell you what I learned about the true value of furniture.
Restore the original beauty
I didn't know what was hidden under the layers of old paint until I started stripping. The resulting oak root is beautiful - with images and colors that I did not expect.
My old table is completely hidden marks and small details. Wood tells a story that new furniture cannot compare to.
I spent hours carefully removing decades of paint, each layer revealing more of the table's natural beauty.
Save money by repairing old parts
I will be honest about the expenses I spent $75 on getting rid of supplies and tools. A similar new oak table would cost me over $800.
Best of all, I already have the parts so no need to buy. The money I saved went to a nice dinner in honor of the project.
Although it takes time and effort, the financial benefits are obvious. Plus, I already have all the tools for future projects.
Configure your tools
The best part came after the stripping: I was able to make the piece exactly how I wanted it. I chose a light stain that matched my kitchen perfectly.
You simply cannot achieve this level of control with store-bought products. When friends come over, they often ask about the table, and I'm proud to tell them how I brought it to life.
Every scratch and mark makes it unique, and knowing that I did the work myself makes it even more unique.
The whole process taught me that old furniture is not only about looks, but also about giving new purpose to things with history.
My grandmother's table was no longer just a piece of furniture; It is a piece of family that I took back in my own hands. This feeling is more important than any new table can give.
What will be used to strip the furniture?
After trying different methods on my grandmother's table, I want to share what really worked for me.
I tried chemicals and natural alternatives in a few places before I was completely wiped out.
Chemical removers and solvents
I first started with a spot-type stripper. Here's what I've learned works best:
For thick layers of paint: I used free paste without methylene chloride. The job took about 30 minutes, but it didn't leak on vertical surfaces.
In stubborn places: The gel remover worked well - I left it on for 15 minutes and then used by gently scraping.
For final cleaning: Mineral spirits helped remove all residue.
Important note: always work in a well-ventilated area. I installed two fans in the garage and used ventilation. The fumes are strong even with safer modern formulations.
Natural and environmentally friendly options
When I worked in smaller rooms of the house, I tried lighter options:
Soy-based stripper: It took longer (about 2 hours) but was not that difficult. The scent is subtle enough that I can work indoors with good ventilation.
Citrus stripes: Ideal for light surfaces. I used it on a small side table with a coat of varnish.
Love and language: This combination helped soften some waterborne paint, although it required more elbow grease.
The basic tools for peeling
My tried and tested list of essential tools:
Scratched metal: I bought two sizes - 2" for details and 4" for larger areas
Plastic scraper: Important for softer woods to avoid scratches
Steel wool (class 0000): Perfect for cleansing after exfoliation
Natural bristles: I used it to apply the stripper to the corners
Rubber gloves (resistant to chemicals): Regular cleaning gloves don't last long
Throw in the towels: A thick type of fabric works better than plastic
Safety equipment: Goggles, respirator and long sleeves saved me from itching
Other useful things:
Old plastic containers for paint remover
Crackers (lots of them)
Steel brush for difficult areas
Plastic scrub pads for final cleaning
I will now keep all these tools in a separate case, ready for my next project. Start with the basics and add tools as needed - this has worked best for me.
Different methods for peeling furniture
Use chemical removers
My first big project was a wooden box, and my process step by step:
First I put on thick rubber gloves and goggles
Apply the remover in a thick layer to the old paint
I waited 20 minutes (I learned this the hard way - rushing doesn't help)
I used a plastic scraper to remove the bubble surface
Stubborn stains require 2-3 applications
What worked well: The chemical remover removed multiple layers at once. Anyway: the smell is strong, even with the windows open and the fans running.
Heat gun method
I tried it on a small table and this is what I found:
Keep the gun in constant motion to avoid damaging the wood
Keep it 2-3 inches from the surface
Rub the edges of the bubble surface.
Work in small 4-inch sections
What worked well: No harsh chemicals needed. Anyway: we had to be careful not to burn the wood. I left a small mark on my first try.
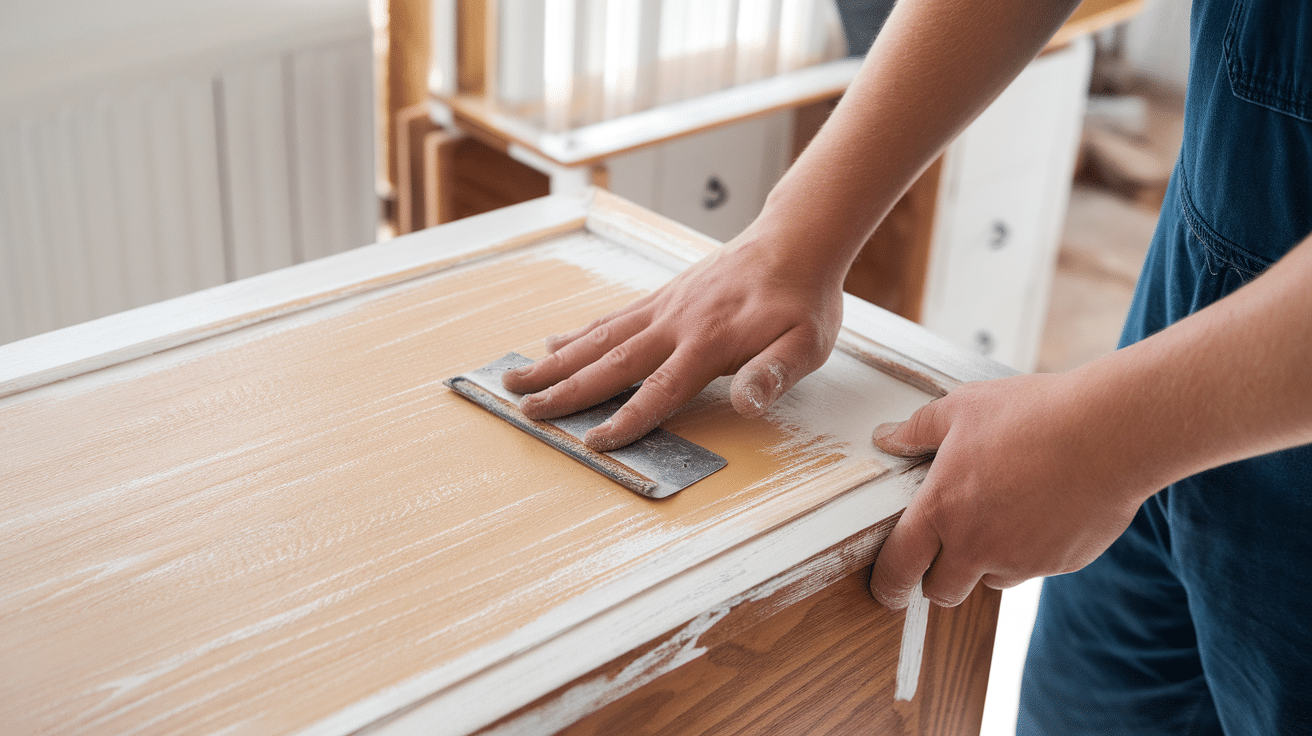
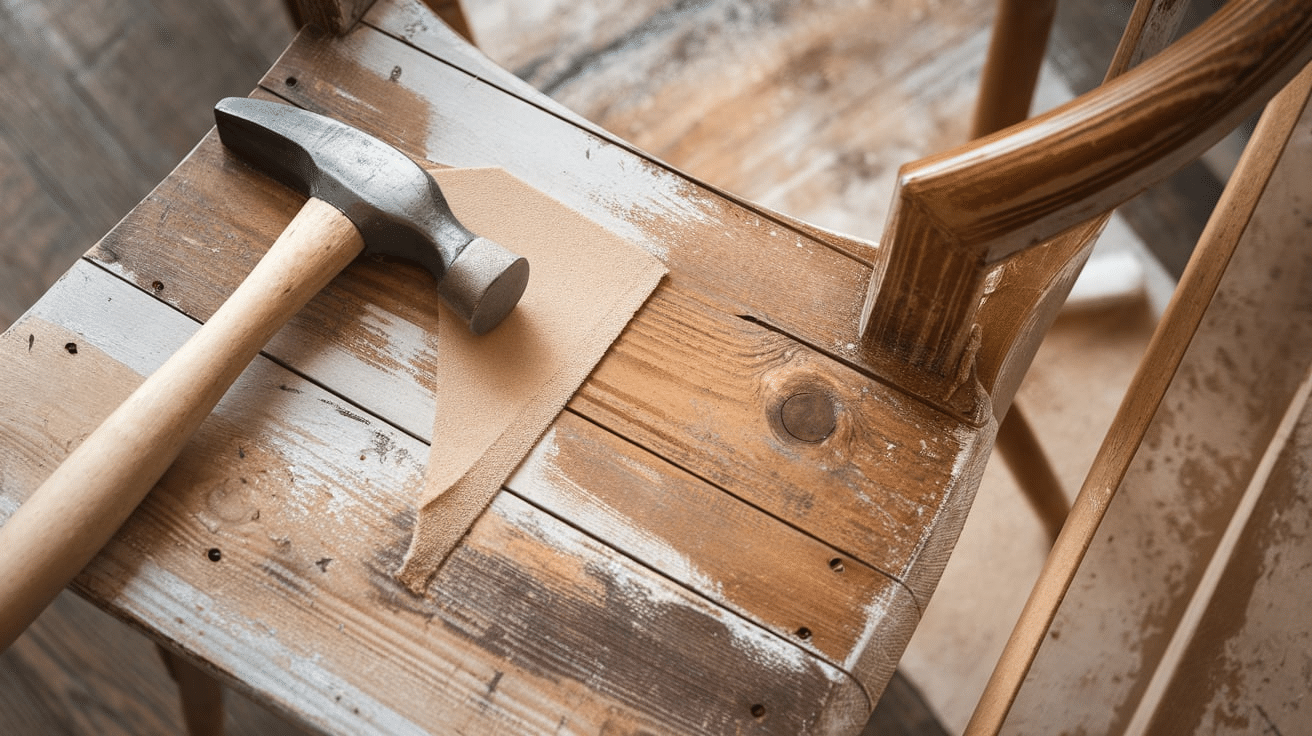
Grinding and milling methods
I chose the sand for my dining chairs:
Started with 80 grit sand paper
Moved to 120 grit to smooth
Up to 220 grit
Uses a sanding block for flat surfaces
Curved parts are hand sanded
What worked well: Full control over the process. Anyway: it made a lot of dust, took the longest.
A natural and homemade solution
With my kitchen cabinet doors, I try softer options:
White vinegar mixture:
Mix equal parts of vinegar and warm water
Bound in steel wool
Let rest for 30 minutes
Clean with a damp cloth
Baking soda pastes:
Thick water-based pastes
Applied to difficult areas
Leave for 15 minutes
Massage gently
What worked well: safe to use indoors, without strong smoke. What it's not: Requires more physical effort, works only on lighter surfaces.
I now write notes on each project and highlight what worked best for different types of finishes.
The method you choose really depends on your room - there is no one-size-fits-all solution, as I've learned through many experiments.
Tools and materials needed for peeling furniture
Based on my recent furniture removal projects, here is a complete checklist of everything I need:
Release agents and solvents
1 can of gel-based remover (the paste kind worked best for me)
1 bottle of mineral spirits for cleaning
1 bottle of white vinegar for natural cleaning
1 can denatured alcohol for final wipe
1 spray bottle with clear water for neutralization
Protective equipment
2 pairs of chemical resistant rubber gloves (one as a spare)
1 spiral with new cartridges
1 protective glasses that close around the eyes
1 old long sleeve shirt
1 pair of closed shoes
1 pack of disposable clothes
2 drops of cloth (cloth works better than plastic)
Brushes, scrapers and sandpaper
2 natural brushes (2 inches and 4 inches in size)
1 plastic scraper (width 3 inches)
1 metal scraper (2 inches wide)
1 pako da meza stila lano (grado 0000)
1 knife for tight spaces
Sand sheets: 80, 120 and 220 grains
1 piece of snow
1 wire brush for difficult areas
1 pack of clean rags
1 pack of paper
Final products (fermentation, stain, sealant)
Wood stain (I used 1 liter)
Pre-Stain Wood Conditioner (1 Quart)
Clear finishing agent (1 liter)
2 foam brushes for applying stains
1 fine sealing brush
1 adhesive cloth to remove dust
1 bottle of wood repair putty
The wood filler matches the shade of your wood
1 mixing stick
Other useful things:
Plastic containers to dispose of leftovers
Old newspaper to cover the workshop
Small container for clean water
Garbage bags for disposal
Work light improves visibility
A small brush for cleaning details
Notepad to track progress
A step-by-step guide to removing furniture
Step 1 - Prepare the workspace
First, I cleared a 10x10 foot space in my garage. I put a drop on the fabric and then put old newspapers on top for extra protection.
I opened both garage doors and installed two fans - one inside, one for good air circulation. It took about 30 minutes to install properly, but it saved me countless headaches later.
I removed all the supplies from the closet and stored each piece in labeled plastic bags. Take photos of where it all happens - trust me on this one.
I learned this after spending an hour trying to figure out which knobs went where next.
Step 2 - Application of exfoliant
I started with the top surface and worked in small 2×2 foot sections. Using an old brush, I applied the scrub in thick, even strokes, all in the same direction.
The key here is patience - I waited a full 20 minutes before touching it. On my first try, I rushed after 5 minutes and just made a mess.
The remover should look like thick mayonnaise when you apply it. If it works, you're using too much.
I find it helpful to work on flat surfaces first and then move to vertical once I get the hang of it.
Step 3 - Scrub the old surface
This part is strangely satisfying. Using a plastic scraper, I removed the bubble surface along with the grain of the wood.
The first layer comes on like butter. For stubborn stains, I applied more remover and waited another 15 minutes.
I kept nearby a cardboard box covered with garbage, where the scraped soil was thrown.
The smell was strong, so I took regular breaks to get some fresh air, even with a mask on.
Step 4 - Sanding the surface
After scraping, I let the wood dry overnight. The next day I started with 80 grit sand on my sanding block, always moving with the grain.
Some areas need special attention, especially around the edges.
I switched to 120 grit and then finished with 220 grit for a smooth finish.
Between each sanding coat, I wipe off all the glue. This step made a huge difference in the final finish.
Step 5 - Clean and dry the furniture
Final cleaning is very important. I wiped off all the mineral spirits on old white cotton towels.
You can tell it's clean when the rag is clean. I changed clothes a lot - it took longer than I expected.
Then comes the waiting game. I let the cabinet dry for a full 24 hours in my garage with the fans running.
The humidity was high that week so I added a dehumidifier. It is better to wait a day more than to rush this step - I learned this when I had problems with a previous project.
Looking back, every piece I took apart taught me something new.
The process takes time, but seeing the natural wood under the old paint is worth it.
Remember to rest and don't rush to dry off.
Tips for peeling different types of furniture
I worked in different rooms in my home, and I put together specific tips for different materials. What have I learned from my practical experiences with each type?
Peeling of wooden furniture
When I carved my oak dining table, I noticed a few important techniques:
Test locations are important: I'm always hidden in the test now. My first table had different woods under the finish!
The direction of the grain is important: scrape and sand with the grain, not against it. I was wrong once - scratches are hard to fix.
Each tree requires different care:
Pine (my bedside table): light pressure is needed to avoid cavities
Oak (dining table): Scratching can be more severe
Maple (kitchen chairs): requires more time between peeling treatments
One thing I wish I knew sooner is that old wood and new wood react differently. My 1950's dresser took half an hour to disassemble my new shelf.
Removal of metal tools
My metal yards have taught me these things:
Start by removing the loose paint
Small sections work best - I do 1 foot areas at a time
Keep peeling paste thick on vertical surfaces
Look for rust spots on the bottom
Clean twice with mineral spirits to prevent rust
I ruined my first metal chair by letting the stripper sit too long - it started growing on the surface. Now I check every 10 minutes.
Strip painted furniture
Painted pieces require special attention, as I learned in my bathroom:
First, count the layers of paint - check the edges where paint chips are visible.
Some thin applications work better than thick ones
Older paints (before 1978) may be lead-based:
I sent a sample for testing
Use of wet blasting methods for dust control
Keep children and pets away
Paint remover is required in some areas
My best tip: keep the surface wet while I work. After I let the parts dry, the remaining paint was harder to remove.
I now keep a project notebook with notes on what worked for each piece. This way I saved time and materials on future projects.
Remember that each piece will tell you what it needs - you just have to be attentive and patient.
Common mistakes to avoid when peeling furniture
Abuse of strong chemicals
My first project taught me some hard lessons about chemical release agents:
I didn't read the instructions completely and mixed two different strippers - the reaction destroyed part of my coffee table.
When I started, I poured the stripper out of the can - it splattered on my arm even though I was wearing long sleeves.
I tried to work in dark and overlooked places where strippers congregated and ate in the woods.
What should I do now?
First, pour the release agent into a small container
Work in bright light
Use only one product at a time
Apply with a brush, don't go straight there
Check the weather: humidity above 85% or below 30% will affect the drying time.
Do not protect surrounding surfaces
This mistake cost me time and money:
The stripper seeped through my thin plastic sheet onto the garage floor.
Chemical spills left permanent marks on my walls
The metal hardware I forgot to remove was broken
My current lineup includes:
Two layers of drop cloths: fabric below, paper above
Walls covered with 3 feet of plastic sheeting
Delete ALL material, even if it looks protected
Keep cleanup equipment ready for immediate cleanup in the event of a spill
Cover nearby objects: Vapors from paint remover can also damage surfaces.
Excessive scratching and damage to the wood
My enthusiasm caused permanent damage:
I hit hard with the metal scraper - leaving deep grooves in my pine table
Scratch into the grain of the wood - create scratches that require additional sanding
I got impatient and scraped before the peeler was fully functional, damaging the surface of the wood.
Who is better?
Use plastic scrapers for softwood
Let the stripper run completely - usually 20-30 minutes
Press gently - let the scrubber do the work
Always follow the grain of the tree
Try the hidden pressure first
Biggest Lesson: You can't rush this process. Every time I tried to speed things up, I made a mistake that took longer to fix than if I had been patient in the beginning.
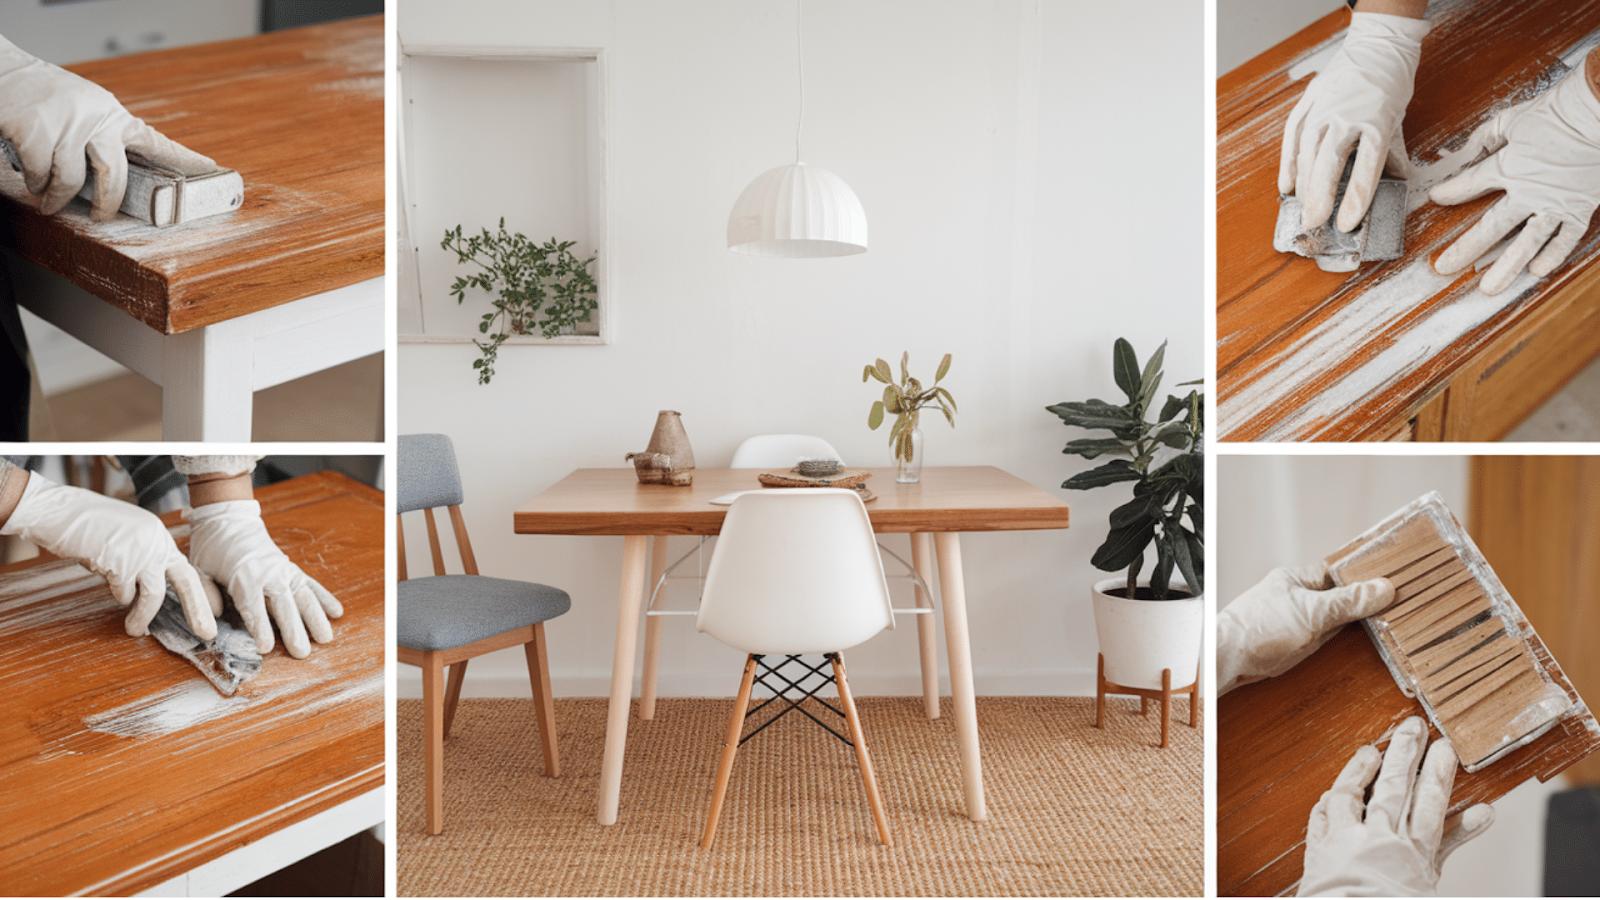
How to restore striped furniture?
After disassembling six pieces of furniture in my home, the final step became my favorite part. I will share what I have learned to bring these pieces to life.
Cover or paint the furniture
The first piece I finished was my grandmother's dresser, and the process opened my eyes to some important steps:
I started by testing the stains under the dresser - I saved myself from a big mistake. The first patch I saw was nothing like the box sample.
I tried three different shades before I found the right one. Wood absorbs stains differently depending on the type and age.
For the actual staining, I first used a pre-staining wood treatment. I ignored this in my other project and got fuzzy results.
The conditioner helps the wood absorb stains more evenly. I let it dry for 2 hours and then started painting.
My method now:
Apply thin, even layers with a lint-free cloth
Wait 5-10 minutes
Wipe off the excess with a clean cloth
Allow to dry for 24 hours
Add another layer if necessary
For the painted pieces I learned:
Use wood putty for all holes
Sand between primer coats
Apply thin layers of paint
Allow complete drying time between coats
Seals and protects the new surface
The sealing step protects from all your hard work. I ruined my first attempt by rushing: the sealant bubbled and I had to start over. Here is my current process:
Start in a dust-free area. I wait 24 hours after dyeing and then wipe with a cloth. The first coat of sealant is thin - I use a high quality brush and work with the grain of the wood.
Three thin layers work better than one thick layer. I wait 6 hours between coats and lightly sand with 320 grit paper between each coat.
The final coat takes 72 hours to fully cure. I learned that when I put things on the table very quickly and won at the finish line.
For my daily care:
Use coasters and pillows
Clean with a soft, dry cloth
Keep rooms in direct sunlight
Check the wear every few months
Repair the seal annually in high-use areas.
The wait times seemed long at first, but speeding up the process only led to new jobs. Every piece I make is better than the last because I learn something new every time.
Conclusion
After months of stripping and redoing furniture in my home, I can tell you this: good work takes time, but results last for years.
Done well, you'll save money and end up with sensible pieces. My grandmother's desk now sits in my kitchen, better than new, every ring and mark telling a family story.
Start small - maybe a side table or a simple chair. Familiarize yourself with the process before starting larger projects.
Keep your workspace well ventilated, always use safety equipment and don't rush drying times.
Remember: furniture removal is not about speed. It's about bringing old songs to life with a careful step.
The pleasure of seeing bare wood emerging from under the old surface and then given a new life - this feeling makes every hour of work worth it.
Frequently asked questions
How long does it take to disassemble the furniture?
In my experience, it takes a total of 2-3 days to strip a twelve piece table. This includes stripping (4-6 hours), drying time (24 hours) and finishing (24 hours).
Larger pieces, such as a box, require 4-5 days. Weather and humidity may change during these times.
What type of remover works best for old paint?
After trying many products, I find that gel removers work best on old paint. They stick to vertical surfaces without leaking and remove multiple layers at once.
For paints over 30 years old, I always test for lead first with a home test kit.
Can I dismantle indoor furniture in winter?
Tried it once - not recommended. Even with the windows open, the smoke was too strong. I now use my garage with two fans for ventilation.
If you have to work indoors, use natural strippers, but remember that they will last a long time.
How much does it cost to strip a shared room?
For my last side table project, I spent: $25 for paint removal, $15 for safety gear, $20 for sandpaper and tools.
Total cost is about $60. These supplies cover it for me to use again. Compare that to $200-$300 for a professional skin.
Why does my wood stain after peeling?
This happened to my first dresser. Why? I skipped the wood conditioner before staining.
Some woods, such as pine and maple, require conditioner to absorb stains evenly. Now I always try the bottom of the pieces first.


0 Comments